Skip to Content Skip to Search Go to Top Navigation Go to Side Menu


"DIY" Tag


Chair-making for Dummies


Tuesday, October 24, 2017

“A seperate seat for one person, typically with a back and four legs.”

The result of google-searching what is a chair?


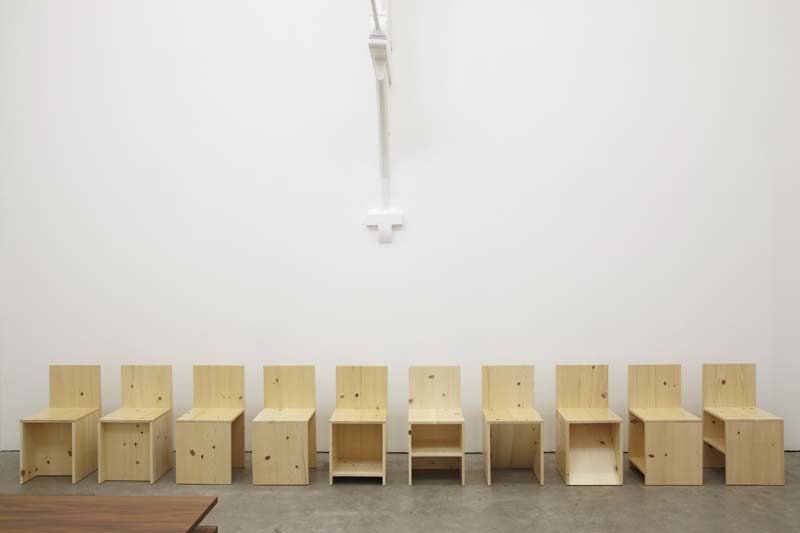
Donald Judd started making furniture when he moved with his family to a remote town in Texas in 1973. No desirable furniture available in his surrounding area, he got to work himself and began making furniture with the only material at hand, lumberyard-cut pine.

Judd thought a chair had to show the function of the object, as well as the image. To sit on it, and a chair. Separating his art from his furniture, he decided he wanted to make “well functioning” furniture, not an “artist’s furniture”. Now, in his opinion a “well functioning” was determined by the following;

“The art of a chair is not its resemblance to art, but partly its reasonableness,                                       usefulness and scale as a chair.”                                       (Donald Judd from “It’s Hard to Find a Good Lamp” 1993)

Besides that he pointed out that if one was to embark on both the path of furniture making as well as art, that there will be consistent similarities in the interests in form.

I had the choice between either doing theoretical research or practical, research for the essay. For the sake of my own enjoyment and an end result where I  have heart for, I choose the latter. Making the chair and experiencing it Now, here my task started. Figuring out how to make a “well functioning” chair, and keeping in check with Judd’s minimalist aesthetic. Truth be told I was quite excited!

For more information on Judd and his furniture I have the following link;

 (click the yellow dot to click the link)

Chairs man


Step one, gather the materials. 

IMG_5774

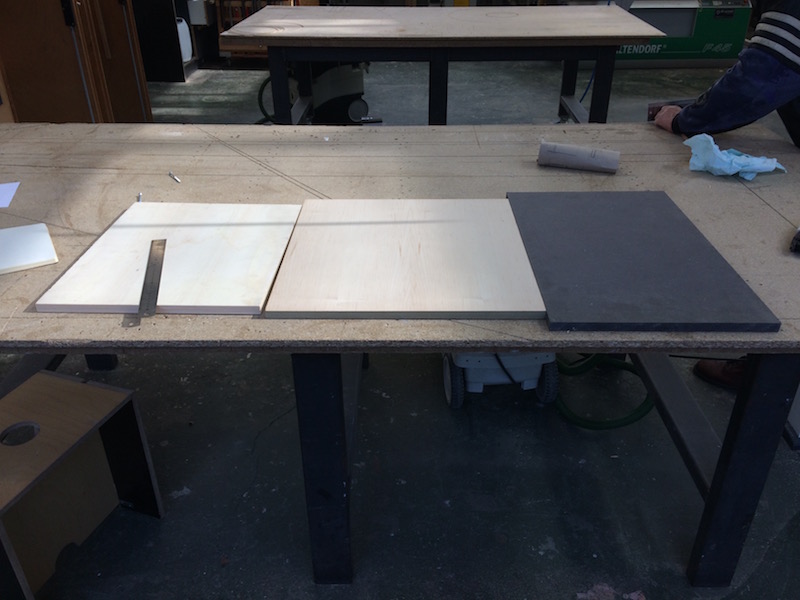
For me I wanted to put myself a bit in Judd’s situation. To gather from the materials to my disposal. I could’ve chosen to let wood be custom cut for me, but I liked the idea of having to find pieces among the leftovers a lot better. And so I found the pieces of wood that could be used as the parts of my chair.


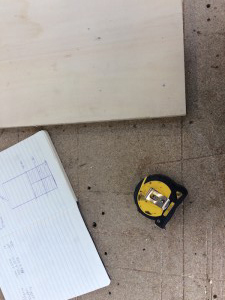
Step two, measuring. 

22790181_736686986530751_938404995_oIMG_5775-300x225

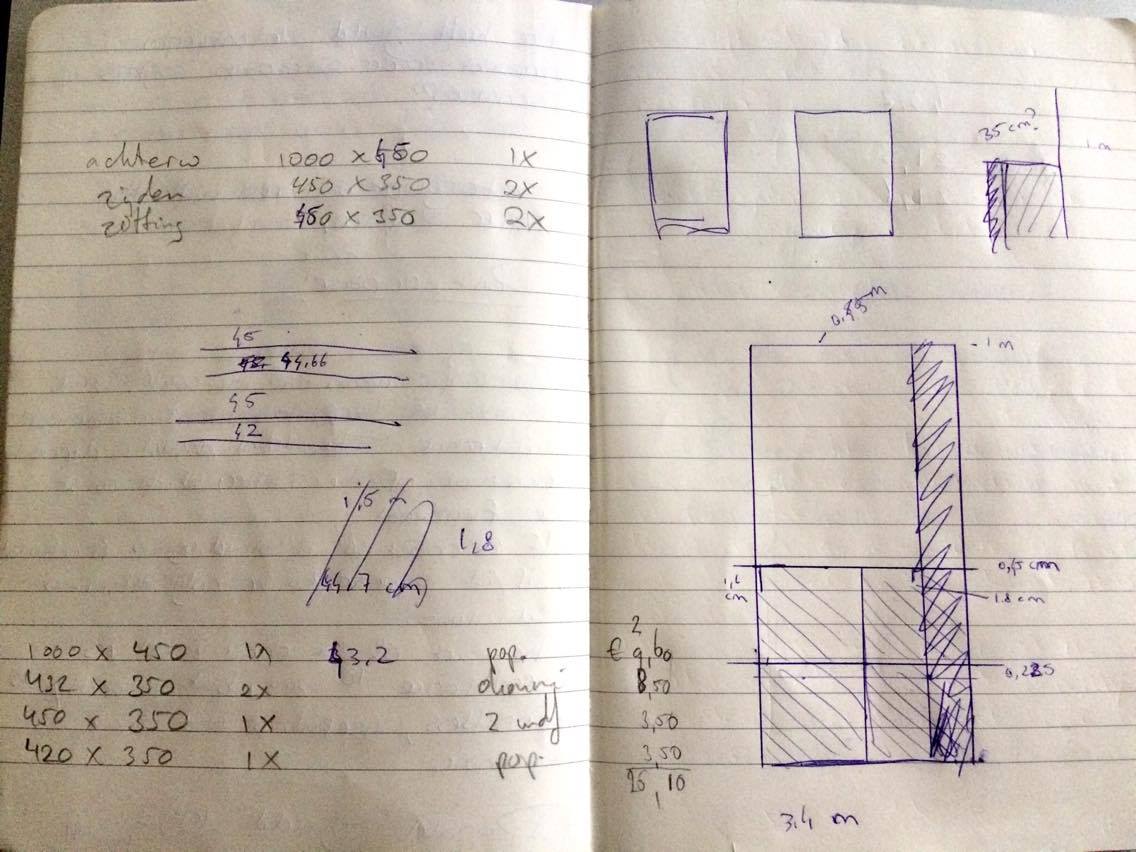
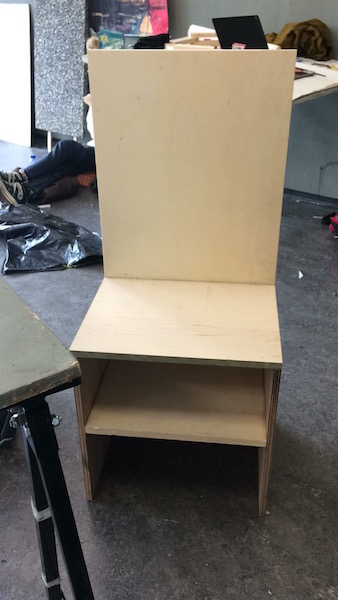
With this I had to keep in mind design as well as function. The width of seating had to be comfortable, but not look off-balance compared to the rest of the chair. The height of the seating was the same case. As for the back of the chair, I decided to make it about shoulder height when sitting down. This was because I have the tendency to hunch my shoulders too much while working on projects. And honestly, if I was making a chair anyways, why not make one that would function for more than just another chair in the classroom? Why not make one that would help with my posture as well? Same thing for the smaller compartment under the seating, great for storing materials in case my desk gets too crowded.


Step three, cutting. 

IMG_5780

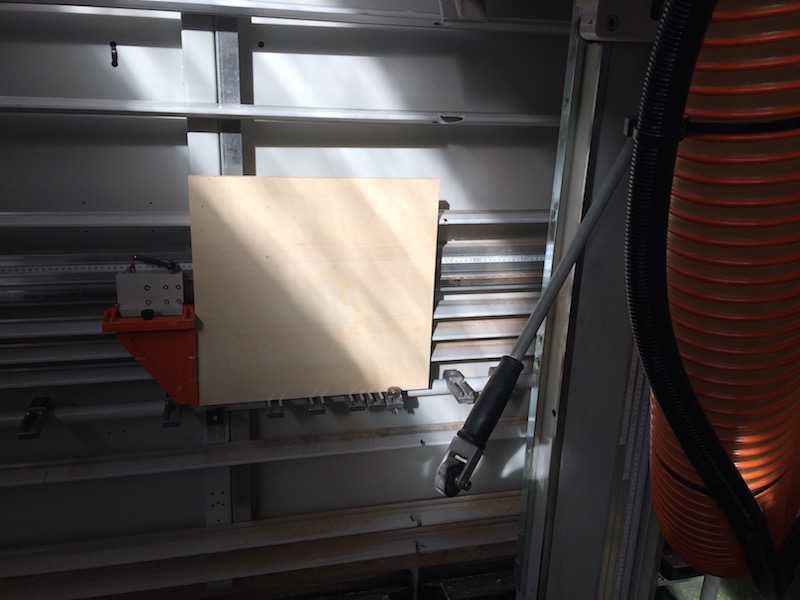
Please be careful when cutting the wood! It is easy to forget to adjust the size, and if you cut one piece entirely or even slightly off, you’re a long way from home. Precision is essential with making a chair as simplistic as the ones by Judd. One centimeter off, and the whole work falls apart. Sometimes even literally.


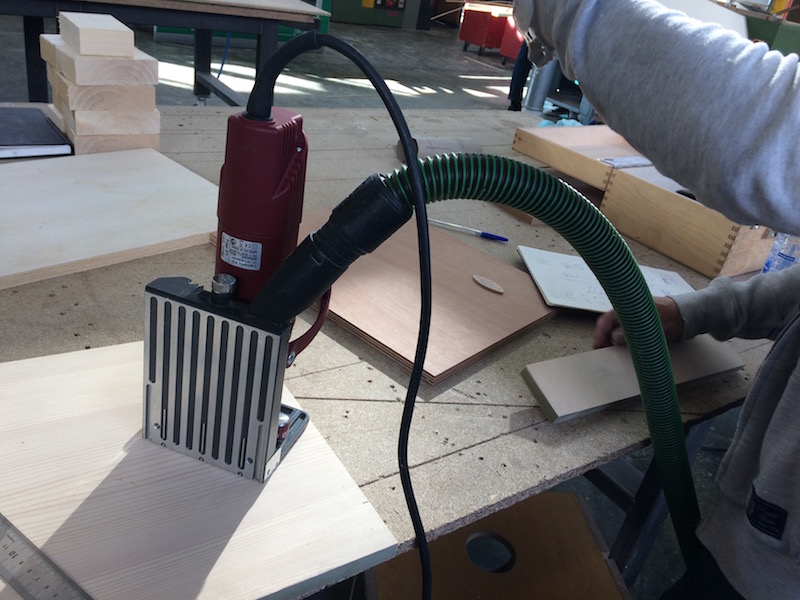
Step four, figuring out how Judd even kept his works together. 

This was easily the hardest part. I love the form of Judd’s chairs, but it was quite complicated to figure out how the wooden chairs remained chairs without any visible nails or use of dovetail joint. I was lucky to receive some help by one of the employees of the wood-workshop. She explained to me that I could make little slits within the wood, to then make one on the other piece of wood which would touch it at the same point. A small oval piece of wood would then be put between the two slits and keep them connected. Kind of like a puzzle piece!


Step five, actually putting it together. 

IMG_5782IMG_5828

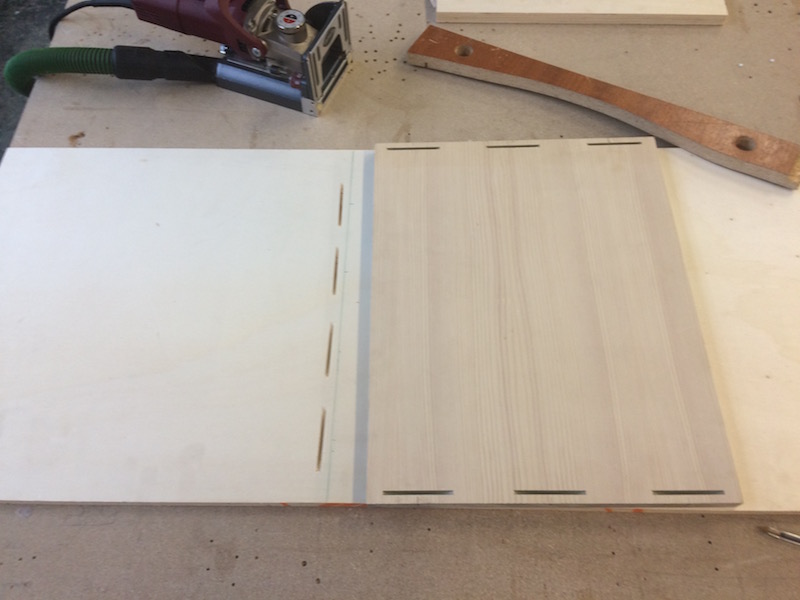
For someone that has the concentration level of a fruit-fly, this task was a challenge. You have to make sure that all the slits connect perfectly, align perfectly, and that the width between the slits and where the wood is supposed the end, are the same on both pieces.

Then, you try it out. Put it together to make sure that every puzzle piece connects. Ensuring you did it correctly through and through.

IMG_5827


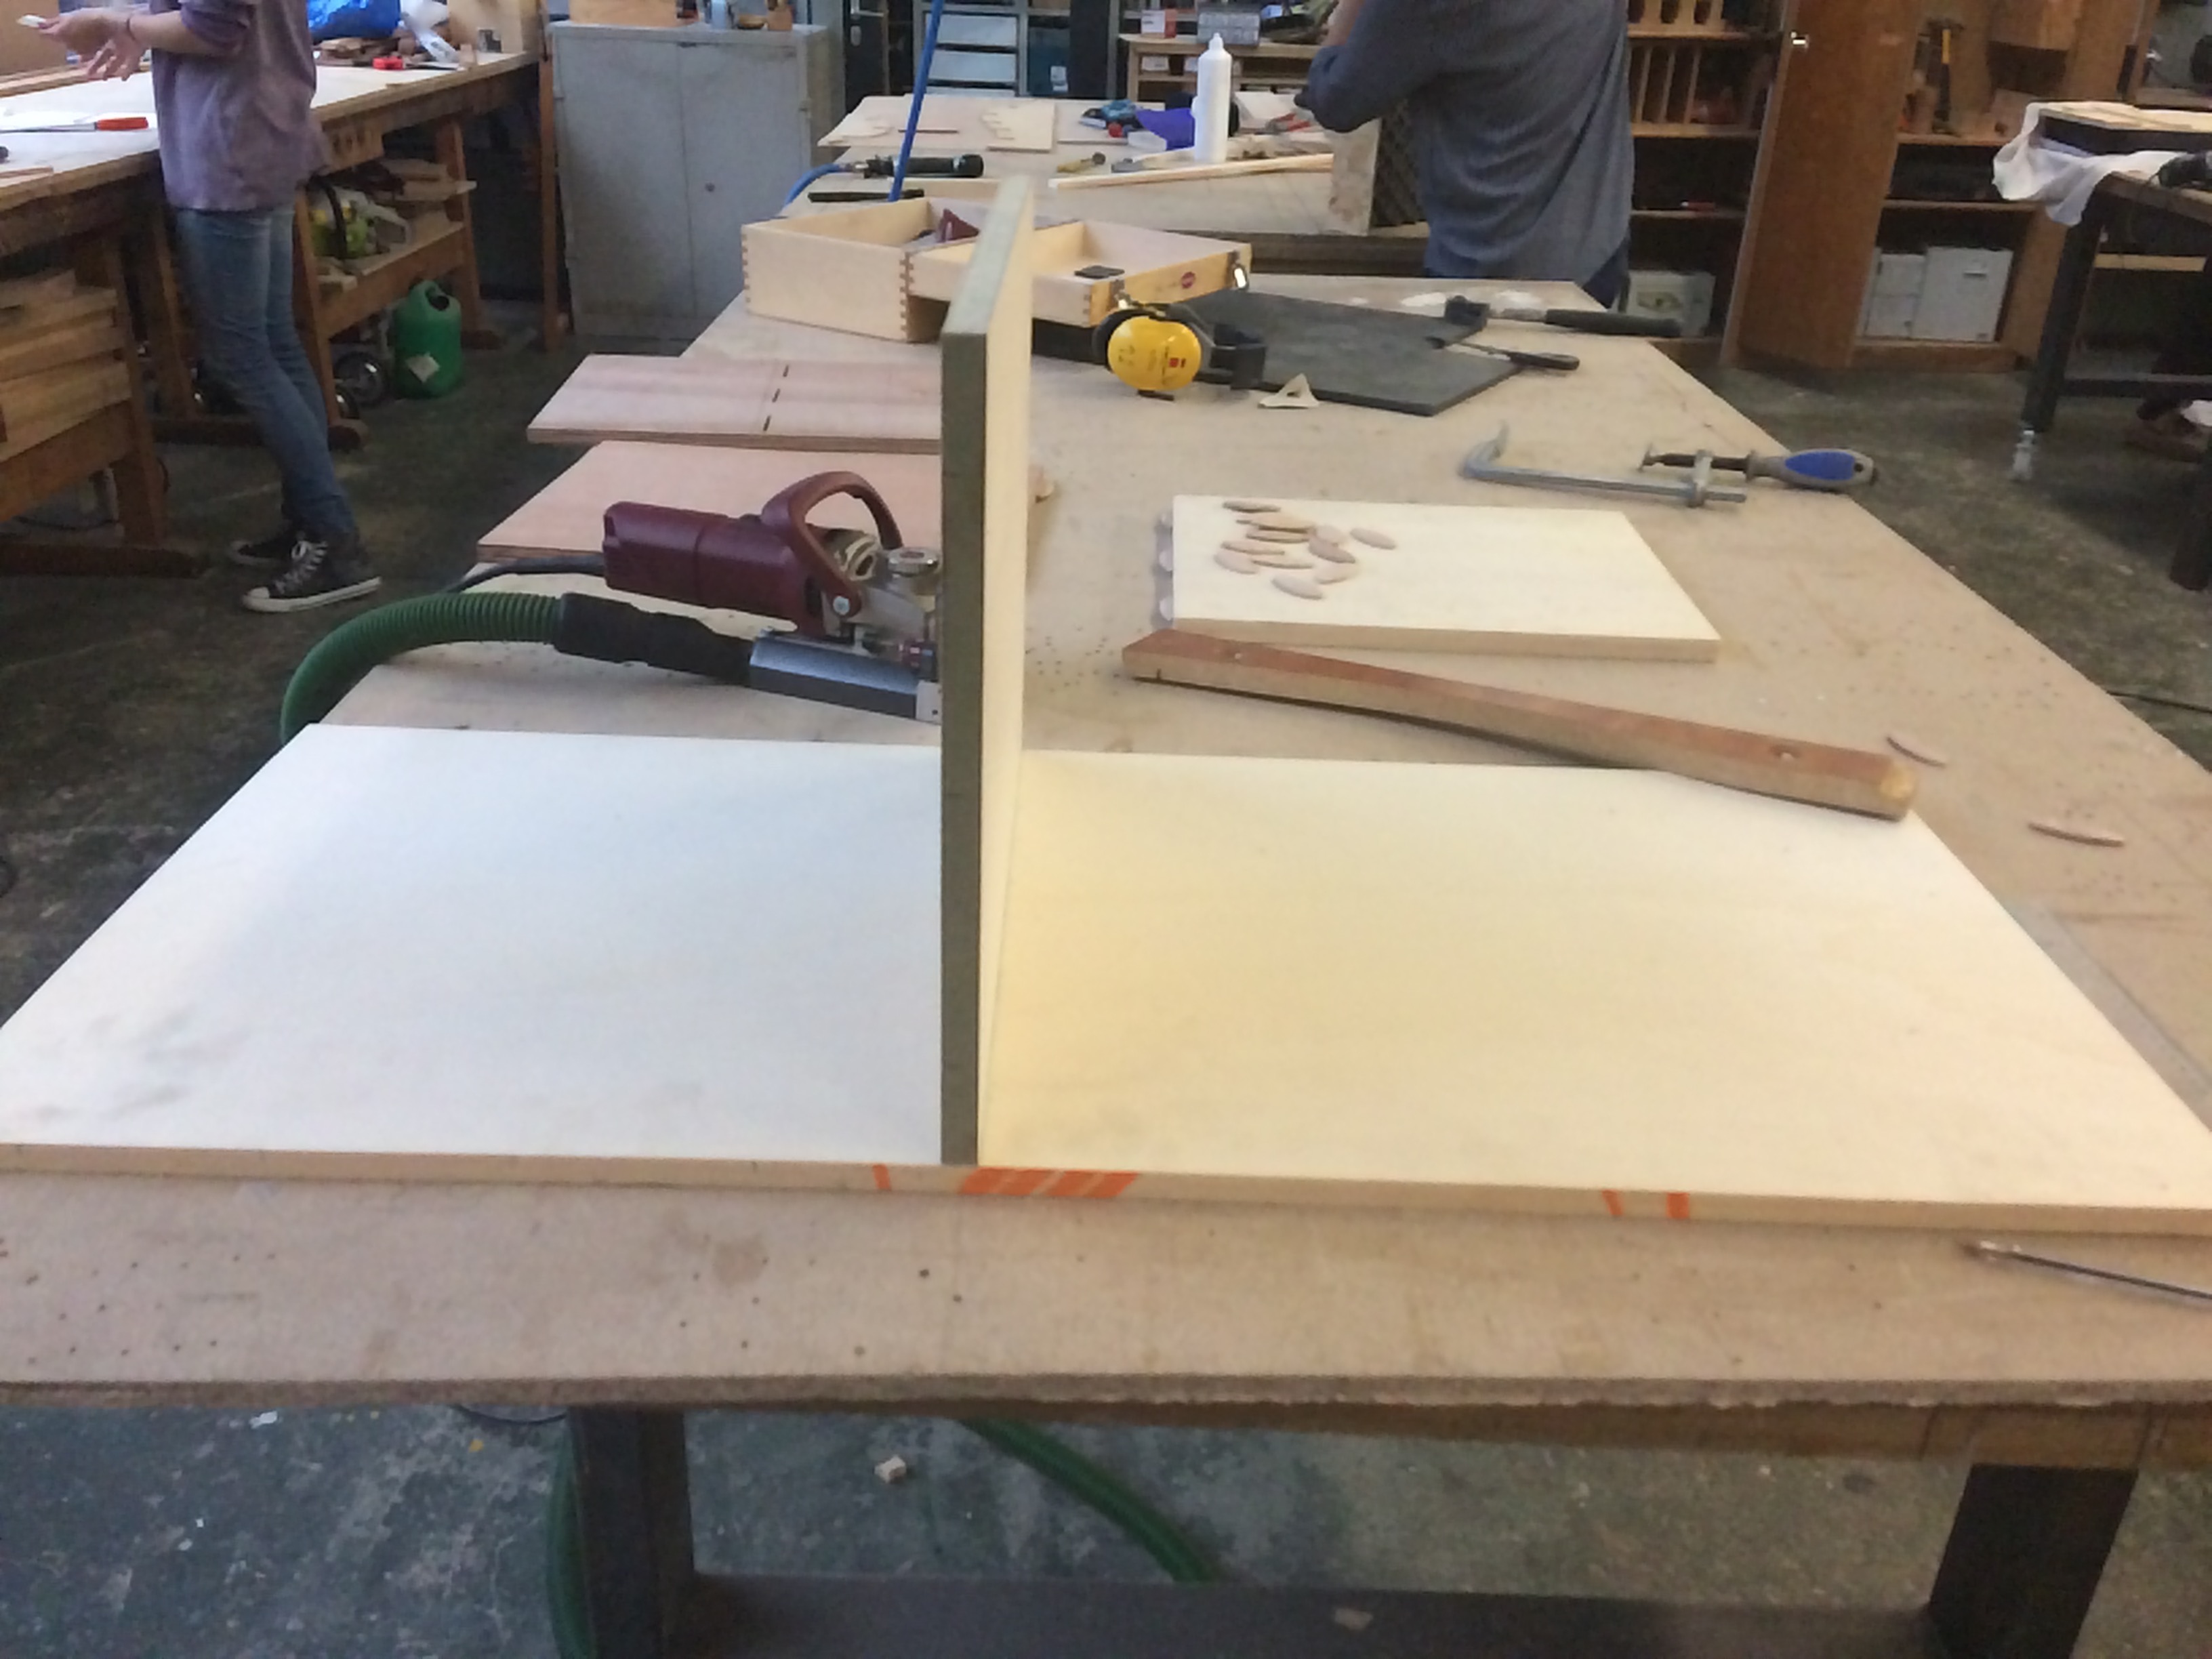
Step six, keep it together.

IMG_5830IMG_5844

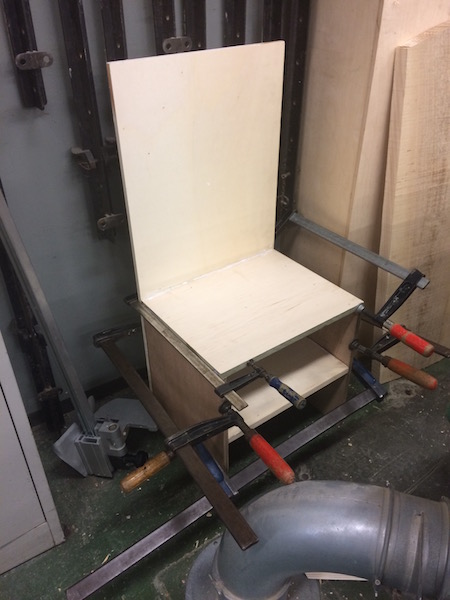
Besides the slits and wooden pieces, you should add glue to keep the chair a chair. Keep pressure on the points where the joints need to be as tight possible, so it can carry the weight of the average person. Preferably a bit more than that.

Let it dry overnight.


Step seven, place it within school. 

The reason I did this, was because the assignment I had gotten was to explore the similarities within Judd’s furniture and de Stijl. And as Judd had said, if one makes both art, furniture and architecture at the same time, there will be consistent similarities of form within all of these. And Gerrit Rietveld, influential artist within de Stijl, happened to do two of these.  My chair standing there, I saw their shapes came together quite nicely. The same geometrical forms, same practicality.

Now if you are interested in finding out more about the combination of these two things, de Stijl and Judd, please click the yellow square!


 chairio

Step eight, enjoy your work

Sit on it, drag it around to sit on it in different places, store things within the compartment and revel in the fact you actually made something you can use.

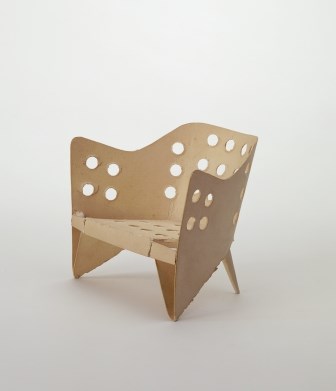
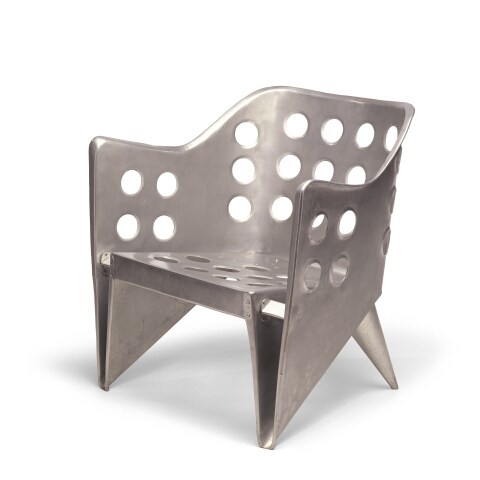
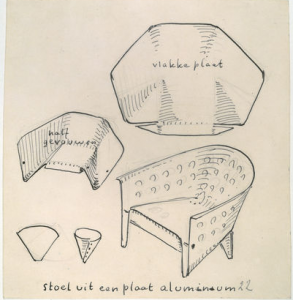
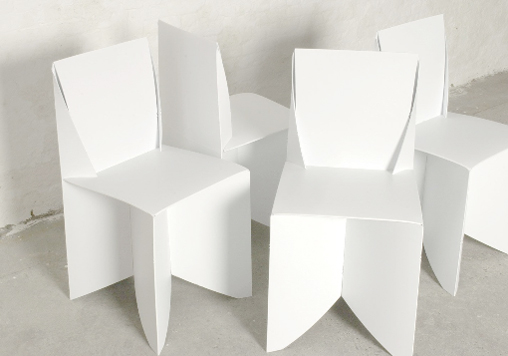
I found a few other enjoyable examples of chairs made from things in your surrounding area.

[click the yellow dot , it will lead you to a fun and educational video]

To sit like a swan


Monday, December 1, 2014

unfolded

The object in this picture is a model of ‘aluminiumstoel’ by Gerrit Rietveld. It is simply a piece of paper cut in a way that when you fold it, it turns into a miniature model of the aluminum chair. The simplicity of this design is admirable, even though the final result in steel does not really give the same feeling of organic harmony. However, this model could not represent the creator’s idea better.


folded<a

Aluminium stoel model[x]

href=”https://designblog.rietveldacademie.nl/wp-content/uploads/2014/11/aluminum.jpeg”>aluminum

Aluminium stoel[x]


Rietveld made this chair in his attempt to create a furniture using one piece of material, or more specifically, one sheet of it. In this case, he used a sheet of metal for the chair we see in the picture and it is easy to understand how he handled the material to display the result in this, since we have at our disposal inside information of the designer’s process of thought, namely; this beautifully cut and pierced piece of paper. Rietveld also experimented with plywood to achieve an immediate connection of an idea with the act of making. When only one piece of material is needed to make an idea come to life, and when that material is so flexible that handling it seems as easy as drawing on a paper with a pen, then there’s a new type of harmony introduced to the design process; that of an immediate, fast action resulting in a beautiful and easy product.


Screen Shot 2015-04-17 at 12.58.59 PM

Sketch of Aluminiumstoel; notice how the designer uses method of folding as a starting point for his research[x]


Rietveld and his contemporaries believed in a new world order, supported through their designs. In that world, one of the essential and necessary virtues would be the one of the minimum dwelling (das existenzminimum). For that to be achieved, all heavy labour would be replaced by machines, giving that way the man the freedom to use his leisure time in whatever way he thinks is best. In that world beauty and simplicity are the main gears of development. This is why in many Rietveld designs, in the model of the aluminiumstoel as well, we see a coexistance in harmony of these two and a lack of complexity which implies that the process of making of that object won’t result in valuing more than the object itself. For me, this is a reason why most of his chairs seem really uncomfortable; he wouldn’t want the owner of the chair to dwell in it for hours. There are examples of designs that embody perfectly Rietveld’s ideology, but were sadly never realised by him, like this chair of assembled plywood, designed in 1927.


plywood rietveld

Plywood prototype, 1958[x]


What I first thought when I saw the paper model – and what everyone probably thinks – is the old Japanese art of origami, the art of folding paper. The idea of folding a piece of paper in a certain way so that it creates a clear shape of something seemed really appealing when applied to interior design. More importantly, it seemed perfect for what Rietveld was aiming for; an oblect made of one sheet of material and whose existance would be a clear statement for an easy, free living of minimum dwelling.
Origami art has influenced many design-based branches, such as architecture, fashion and interior design. Its basic principles have even recently been proved to be beneficial for science when it comes to manufacturing. Assembled Additive Manufacturing is a new process of fabricating developed by researchers, which has origami principles as its base, as it treats 3D objects as multiple layers of 2D sheets.
I was surprised, however, to see that most origami-influenced designs were really static and superficial; meaning that none of them took the idea one step further, none handled the art of origami as a general principle that could be the base of something bigger, or even as a statement. Designer Stefan Schöning came up with a design for a ‘folder chair’, where all that’s needed for its creation is a sheet of polypropelene.


folded chair

Origami folding chairs[x]

This example is really similar to what Rietveld was aspiring to do. Many similar designs have been realised, however it seems to me that they mainly aim at impressing the viewer, at making them admit that “that’s a witty design”, without committing a vision in it, nor giving the viewer and the world a tool for a better living, which will, in its turn, become a reason for contemplation.


Can one have a conversation with an artist who is no longer living?


Tuesday, October 7, 2014


DIY DIY DIY DIY DIY DIY DIY DIY DIY

front page

 
HOW TO MAKE A CATALOG
 

Sterling Ruby [x] / Robert Mapplethorpe [x]

Designer Rutger Fuchs, living and working in Amsterdam [x] [x]


Prep time: 1-2 months
Cooking time: 2-3 months
Total time: approx. 3-5 months


copies : approx. 1000 [x]


Before you start you need to collect a few people to work with.
Besides that you will need:

–       Corporate identity for Xavier Hufkens [x]

  • Typeface: Swift* by Gerard Unger [x]

–       Pictures of art work/photography

–       Pictures from the exhibition [x]

–       Exhibition notes by Sterling Ruby

–       Essay by Ed Schad

–       Gold coated mirror board (spiegelkarton)

–       Red ink

–       Printing Press


When you have found just the right team you collect all the images and structure them. Arrange them as you would hang the exhibition. Make sure that the pictures correspond to eachother. It is crucial to recreate the dialogue between the works, as seen in the exhibition. (A tip: start out with the photography of Robert Mapplethorpe and make Ruby’s works react to that afterwards – it works for me, but play along until you established the dialogue within.)


Then you add a good portion of graphic skills and mix it all up. When that is done, go through the content once again. Does it give you a feeling of entering the actual exhibition? Does the pictures relate to each other? Is the answer yes, please continue to the following step. If not, please go one step back and rearrange until you are satisfied with the result.


Now comes the difficult part – time to press the cover. Here you will need to add a lot of patience and some overwork. First you start out by printing the red title on the front cover. Print it twice to keep the typeface in place. The material is very easy to damage, so be careful to avoid scratches when you uses the printing machine. When the title is printed on successfully and you are happy with the outcome you let it dry. Leave it to dry for a couple of days to make sure the ink is completely dry. (Tip: try to avoid touching the red ink while drying. It might ruin the cover and you will have to do it over again.)


After this you end up with the final result, which should measure approx. 21,4 cm. broad, 26,4 cm. long and 1 cm. thick. This size will make it more suitable for shipping to collectors, friends etc.


Hope you’re happy with your result – enjoy your catalog!


* Swift (1985) This typeface has proved its worth in corporate identities, magazines and newspapers and occasionally in books — it is a versatile type and can be used in a wide range of circumstances. It is a striking type, with large serifs, large counters and letters that produce a particularly strong horizontal impression. This means that words and lines in Swift are easily distinguished, even where there are large spaces between words, as can occur in newsprint. Swift’s large, robust counters were designed to improve legibility particularly in newspapers. It was designed in the early eighties, when papers were less well printed than they are today, and its special features help it survive on grey, rough paper printed on fast rotary presses. Today it is used more often outside newspapers than in. The current Swift (1995) is an improved version with technical and aesthetic enhancements, and has been expanded into a family of twenty-four variants.


///////////


BONUS INFO

A catalog representing an exhibition [x] of Sterling Ruby (American artist 1972) engaging with the photography of Robert Mapplethorpe (American photographer 1946 – 1989).

“Can one have a conversation with an artist who is no longer living? What is the nature of autobiography and biography? Why is psychoanalyzing Robert Mapplethorpe so compelling?”

These are some of the questions Ruby has been working with towards creating a whole new line of works.

all_rights_reserved_xavier_hufkens4MAPP-522-1980


“In a way, one can say that, while Mapplethorpe captured surface transgressions, Ruby’s response has been to take the inside outside and shove it in our faces.”  [x]


exhibitionSterlingRuby2


The catalog itself catches your eye right away with its reflecting golden cover and the red stained typography in the front. I wanted to figure out why especially this shiny cover caught my attention and found this phrase online:

“We have long been obsessed by shiny objects – from the latest glimmering gold iPhone to the sheen of a pair of high heels. … It is humbling to acknowledge that despite our sophistication and progress as a species, we are still drawn to things that serve our innate needs–in this case, the need for water.” [x]


Rietveld library catalog no : map 6

Woman of the Shreds


Thursday, August 8, 2013

My thesis “Aufarbeitung” [reprocessing] is based on a historical research on the influence of economical and political crises on fashion and clothing production from a German perspective, says Verena Michels (fashion graduate 2013). My investigation aimed at finding answers on “how can I be a pro-active designer in the current crises and turn shortcomings into innovation? This theoretical research was the starting point for my garment collection.

© PETER STIGTER  FILENAME IS DESIGNERNAME RIETVELD 2013 GRADUATES © PETERS STIGTER RIETVELD ACADEMIE 2013 EINDEXAMEN © PETER STIGTER  FILENAME IS DESIGNERNAME RIETVELD 2013 GRADUATES

photo's Peter Stigter


trummerfrauen The icon of my collection is the so called “Truemmerfrau” (woman of the shreds): former housewives who were empowered and emancipated through physical labour in post-war Germany during the years of restoration. It was a period of hardship and material-, clothes-, and food shortcomings that encouraged black market and innovation through necessity.
When comparing that situation to our current crisis, I find a paradox: the European financial crisis is characterised not by a shortcoming but by an overload of materials, clothes and food, and what we lack are values, work ethics and a definition of what defines quality in times of mass production and over-consumption.
I decided to look for the answer by researching “material”. After experimenting with dust, lint and fabric leftovers, I chose wool as my main material. It is a highly relevant material for me because of its rawness, because it comes directly from nature (sheep, alpaca, goat), protects our body, keeps us warm, and doesn’t need to be washed. I decided to use wool in a non-conventional way, and put it in a context other than knitting.

COVER Rosemarie Trockel wool painting
Rosemarie Trockel wool on canvas, Dark Threat 2 2010, Syz Collection

Inspired by the wool paintings of German artist Rosemarie Trockel who transferred wool from the female household to established art galleries, I developed a new textile. This material is flat, structured, and requires only the exact amount of yarn without waste. It can be produced at home with a household sewing machine. The simplicity of the technique allows me to share it with friends and to collaborate. This can be a relevant starting point for making production communal and local again. I see it as a contemporary translation of the post-war DIY culture and hope my idea inspires others.

Screen shot 2013-08-08 at 12.13.23 PM

photo by Lutz Bauman

My collection book is an archive of visual research, notes and ideas, documentation of material and form research. It includes two chapters of my thesis and a photo series of the end results. The photo shoot took place at KOBOR, the wool store of Koos Koopman who buys yarns from bankrupt companies or factories that produced too much, and sells it at a fair price.

text by Verena Michels [graduate student department of Fashion] : more verenamichels.tumblr.com


Pdf-icon
Download her collection book ”Treummerfrau“, [woman of the shreds]

Pdf-icon Download the thesis: ”Aufarbeitung“, [recollection]


Log in
subscribe