Skip to Content Skip to Search Go to Top Navigation Go to Side Menu


Systematically Confused


Monday, April 2, 2018

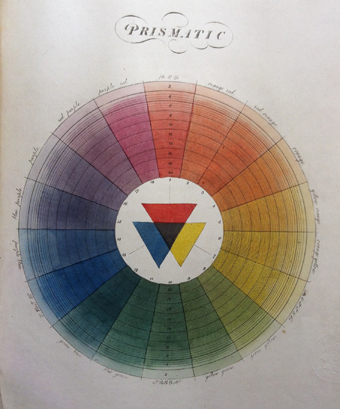
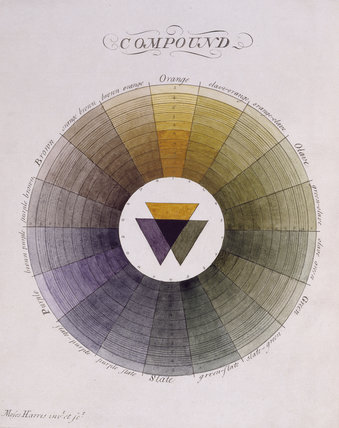
After I made my research on Michel Albert-Vanels innovative colour-system which pushed processes related to colour forward, I had a very scientific image on colour-systems.
After the announcement of creating our own colour-system, I remained being caught in a very theoretical and scientific image of the function of a colour-system.

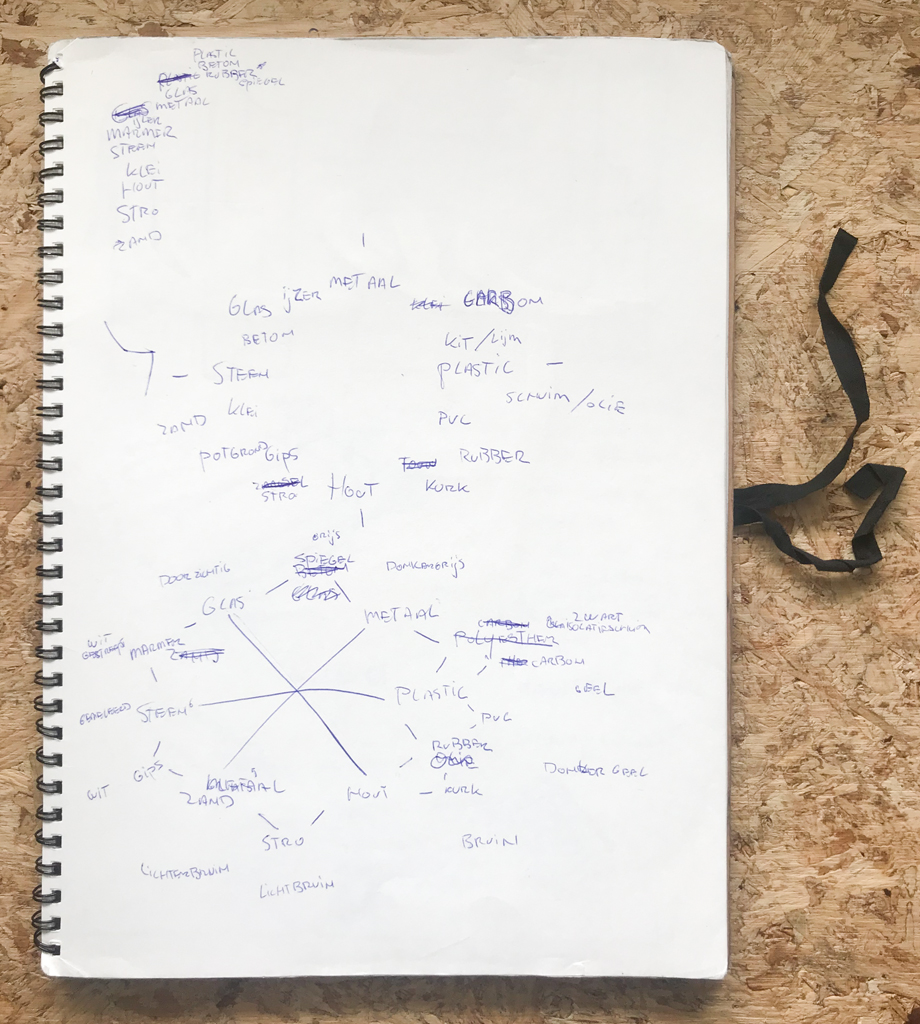
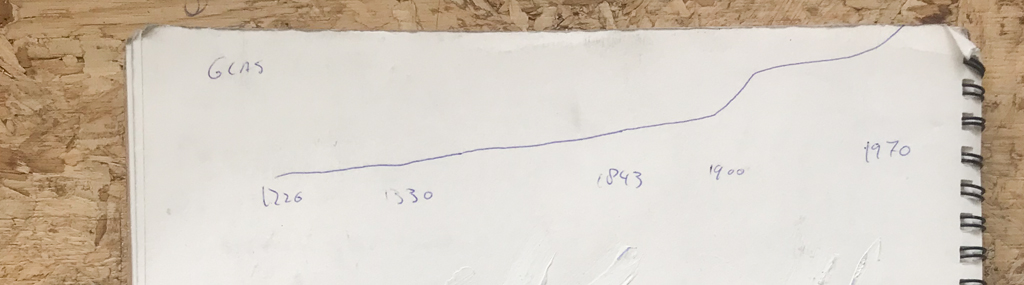
When I look through my notes, I see a lot of short-living attempts of different approaches to the assignment.

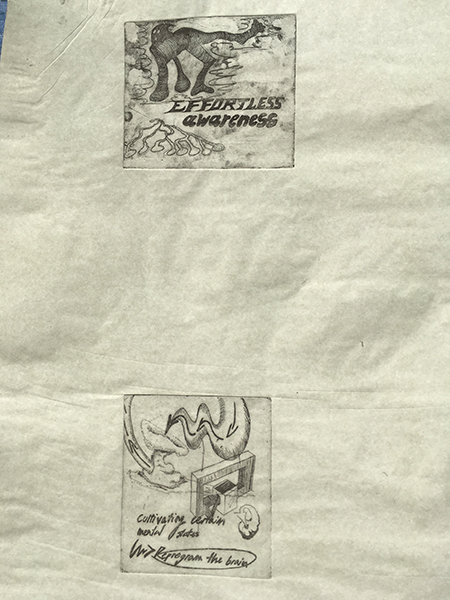
First, it was mostly notes from already existing colour-systems, which should inspire my own one. The first idea was, to connect our free longterm assignment in mixed media with the colour system and looking back, I should have stayed with this idea. In our mixed-media assignment, we work with texts as a starting point. The text I’ve chosen is an excerpt of a dialogue between two friends: Wolf Singer, a distinguished neuroscientist and Matthieu Ricard which left a career as a molecular biologist to become a Buddhist monk. In their dialogue they discuss meditation-practice and it’s direct influence to the human brain.

I’ve started with the idea of making a series of etchings and silkscreen-prints on the topic.

plan_b1
plan_b2
plan_b3
plan_b4

I thought, it might be handy to break down this dense and complex article with the help of colour by, for example giving both of the positions – Singer and Ricard a certain color. So their points and positions are expressed in a certain colour tone of the print.

That would have created automatically a colour palette which is linked to their positions and a mix of new colours when, for example, they agreed on a point, so that both of their positions come together as one.

I wasn’t fully convinced of this idea and missed the systematical approach to it, which I thought is the centre of a colour system. To select some colours for both of the speakers was more of a colour-palette, rather than a system, through which I could „run“ these prints and which would automatically create a colour-composition.

This wasn’t the last idea which started to crackle when I was thinking about systems and probably it was this image of a programmed application like on a computer, which was standing in my way for a long time.

systematical_illustration

Soon, I realized, I could look for a Buddhist and neuroscientist colour-system and bring them in a next step together. But how would this look in the end? what would be the product and the outcome of this idea? I remained helpless and moved on from idea to idea until I rediscovered these promising systematics in music.

I’ve heard about micro-tuning systems a while ago in connetion with the Finnish DJ and producer Aleksi Perälä.

Perälä and his long-time friend and collaborator Grant Wilson-Claridge developed a musical tuning system, the „colundi sequence“. Despite that, Colundi has the character of a spiritual entity, which makes Perälä refering to it as the creator of the music he is producing.wp-content/uploads/2018/04/Schermafbeelding-2018-05-23-om-11.20.23.png

It remains a mystery for most of the people, including the journalist from the article I’ve read about it, what the „Colundi Sequence“ actually is, but what was very inspiring to me is it’s origin:

As we know, most western music is based on the 12-tone tuning system. All of these tones have a certain frequency in Hz, based on harmony.

Like other artists did before, Perälä started developing his own tuning systems in his music which resulted in the Colundi scale, a sequence, which is not a tuning system, according to Perälä.

The Colundi scale „is a sequence based on specific frequencies, often not related to each other in a traditional musical way“.

Grant Wilson-Claridge, Perälä’s friend which was mentioned before, came up with the frequencies for the colundi sequence.

“via experimentation and philosophy, each relating to a specific human bio-resonance, or psychology, traditional mysticism or belief, physics, astronomy, math, chemistry.” he told the music magazine „the wire“.

What he meant by that becomes more clear in one of his Facebook-posts:

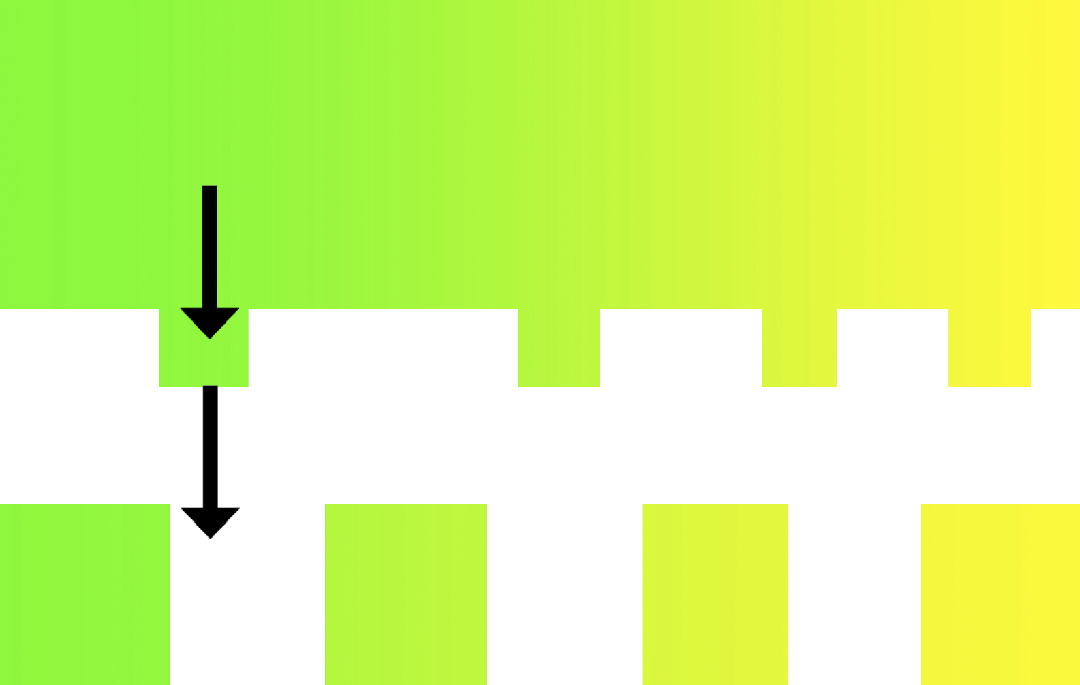
“E.g. 90-111Hz – Beta Endorphin range. 126.22Hz – 32nd octave of Earth year, The Frequency Of The Sun, Color=Green, Tempo=118.3 BPM, centering of magic, Hara (chakra).” So the frequencies all have a specific origin in something natural.

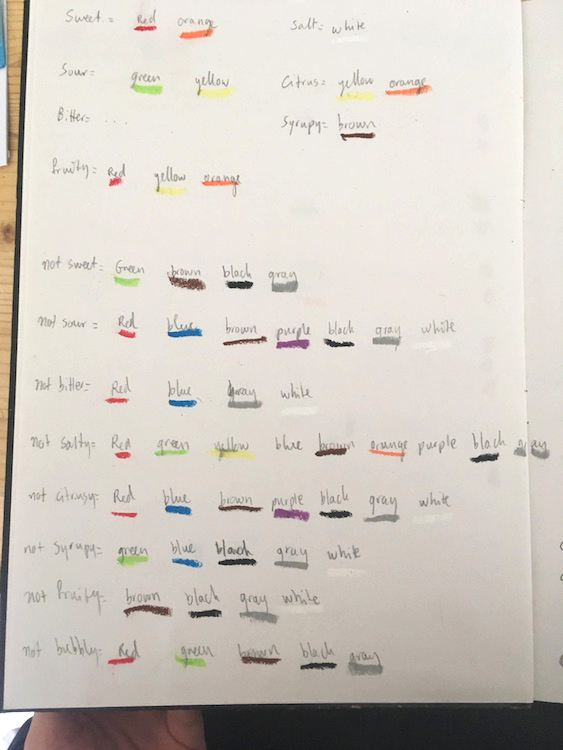
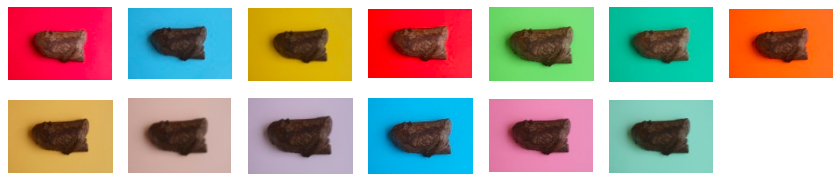
This approach highly inspired me to do a colour system, which is based on specific frequencies, which then would be transformed into colours.

Around this time, the idea of creating a video came up, in which I would involve certain narratives, which carry the colour of their frequency, so there would be the ocean and the frequency of it’s currents as a narrative, as well as other positions like myself and the frequency of my heart-beat.

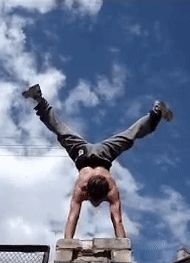
On the search of different narratives, I rediscovered a Youtube-Video, I used to watch very often as a child.

It is one of the first Freerunning-Videos I’ve seen, where Latvian Traceur (Word for people practicing parkour and freerunning) Oleg Vorslav climbs up buildings, flips walls down and jumps from roof to roof.

This video was probably one of my first experiences using youtube regularly as an archive. I was watching this video over and over again with my friends and it was very exciting to rediscover it after so many years.

I knew, I wanted Oleg Vorslav as one of the narratives, so I started to cut out short excerpts from the video to use them for mine.

Oleg_on_the_roofOleg_roofjump

I also started to go through my own video-archive and discovered alot of interesting material associated to colour. At the same time I didn’t know how to continue with my idea of frequencies and this system started to stand more in my way, rather than being a rich addition to the process, what made me decide to drop this idea and naroow it down to it’s essence: producing a video – in anyway.

During the whole process, I had a very thoughtful and conceptual approach to the project which often became an obstacle. At this point of the work, I had a need of a more free and spontaneous approach, so I started soon to edit the video and combine it with animations. I made my decisions quickly and intuitive, which opened up more possibilities for me.

Slowly, a system developed itself, where animations and moving images guide each other through the video, from colour to colour.

Get the Flash Player to see this content.

Looking back to this process, it was very much about handling disturbing thoughts and bringing me back to motivation in any situation or stage of struggling. In the end, I realized, that I could have trusted more into my own ideas and directions which I was attracted to.

I’m still a bit confused about the video I did, because I can’t really explain what it is and where it comes from. It’s been the first time, where I had to act on my gut-feelings out of emergency and tie-pressure, which was a unique experience. Under circumstances like this, great things have been discovered, so maybe we should appreciate stress and time pressure more as an opportunity to make us explore new grounds of our creative process.


Golden Ratio Colour System


Monday, April 2, 2018

As you look at previous colour systems in history, you can see that most of the colour systems are based on a geometrical shape or a figure. The reason behind that is having a geometrical shape as a base helps you to locate colours in a logical way because of their symetrycal shapes and perfectness.

228724823-golden-ratio-wallpaper

Many people used spheres,cubes and pyramids for many diffrent colour systems, But nobody used a special shape as golden ratio. What makes golden ratio this special ?


The golden ratio is a mathematical principle that you might also hear referred to as the golden mean, the golden section, the golden spiral, divine proportion, or Phi. Phi, a bit like Pi, is an irrational number. It is valued at approximately 1.618. As a ratio, it would be expressed as 1:1.618. A rectangle that conforms to the golden ratio would have shorter sides equivalent to 1 and longer sides equivalent to 1.618.

The question is, then, why (or indeed why not) do we find the proportion delivered by an obscure mathematical theory aesthetically appealing?

For a start, the golden ratio tends to crop up with surprising frequency within the natural world: from leaf and seed arrangements to aluminium alloy crystal structures. And it would seem that much of the mysticism surrounding the aesthetic properties of the golden ratio are divined from its natural occurrences.


Even if you do find the golden ratio attractive, finding an explanation for its appeal, beyond the vague assertion that its prevalence in nature gives it some kind of mystical property, is hard to find. I’m inclined to suggest that its mythic qualities enhance its attraction. If something is supposed to represent aesthetic perfection and no other reason supports the theory other than its repeated appearance in nature, it becomes a self-fulfilling prophecy.

c9762bd955f9a16fc039ff3da1c7701e


However, Prof Adrian Bejan, of Duke’s Pratt School of Engineering, has posited a theory pertaining to our preference for the golden ratio that is rooted in his research around the idea of ‘flow,’ and how nature’s designs evolve to enable ever-increasing efficiency of movement. In the case of the golden ratio, it stems from an animal’s need to scan the horizon and quickly apprise it of information. Supposedly the most efficient form for doing this is a rectangle that is approximately one-and-half times as wide as it is tall. This amounts, roughly, to the golden ratio. According to Prof. Bejan: ‘Animal vision should be configured in a way that seeing and scanning should be the fastest and the easiest. And when the proportions allow this to be done, it should be a source of pleasure because of its past evolutionary associations with finding food or a mate.’

The Golden ratio color system is unlimited and can be expanded as required. But in any case, at the beginning of the system there is White and at the end there is black. Between black and White you can see every colour in rainbow orderly located on top of the meridians. There is a fiction in the Golden ratio color system. Each color provides a transition between tones that causes effect on the next color.

tuna colour system


YES/NO COLOR SYSTEM


Monday, April 2, 2018

When first introduced the idea of creating a color system, a small panic appeared in me. After studying ‘theory of color’ in my previous studies, I was afraid that it would turn into a theoretical and precise boring system, where the colors are mixed based on a strict formula, very far away from my interests.
What is then what is so interesting about color for me? What will make me excited or what do I need to create a color system for?
After a long process of reflecting, I decide to take a step out and look at color differently and alienate it from any system that I have studied before.
Reflecting on my need, I’ve always looked at color in food, due to my intolerance to sugar, some food is forbidden, meaning, some colors are forbidden. For example, when my friends ask me, what vegetables can you eat? I say, only greens, so it’s easier for them to remember that tomatoes or paprika or others are not good for me.
Thanks to this I started collecting images from the supermarkets, walking around and seeing the difference between what I can eat and what I can’t. All the bright colors from the fruits and some vegetables, were forbidden of course, and all the not so hysterical colors from the rice, beans, meat were fine.

IMG_8729 IMG_8728 IMG_8727

Now the challenge was, what do I do with this pictures?
Something like a guide, a small booklet I could carry around, and I could give to my close friends, similar to a little Bible.
I always carry a small notebook that fits my pockets, so I decide to take that format and create a two sided booklet, where one side has all the food I can eat, and on the other side it has all the food I can’t.
I took the decision to add a small color mark on the side of each page with the exact color, creating a small gradient on the side of the booklet. On both sides, it starts with light colors, and goes to yellow, orange, red, green, brown and darker. The order of the gradient has been influenced by the harmony between colors in the Coloroid system I wrote previously about.


fructosemia4 yes                        fructosemia3 no
Because it’s a double sided publication, the gradient is on both sides, and always both pages contrast with each other, one being the yes and one the no.

IMG_0913 IMG_0912


7122 The book that inspired me is 9,5 x 15,cm, single pages and glued. The design of it is taken from the notebook ‘Notizen, edition suhrkamp’. (click on both images to access more information about the edition Suhrkamp)

7Teaser

These are the rest of books that this publisher has created and this as well was a part of the inspiration for the harmony in the gradient.


IMG_9375        IMG_9378

It has a yellow cover first, because of the inspiration I took the book from, and as well because of the color of the lemons, which is the only fruit that I can eat. In the presentation I decided to include some lemons that ill hold the book standing and as well camouflage it and integrate it in the space so it’s not flat.
I am very satisfied with the result as well as happy about how much I learnt about book binding, and the paper. For example, how important it is the direction of the fibers of the paper when you print so the corners of the paper don’t bend. Since it was a very precise color scheme, it had to have specific bleed marks and cut marks that I never used before.

Exploring White Light


Monday, April 2, 2018

There’s more then just a simple white, the daylight is very different from the morning to the evening, there is warm white light and more cold to very blue light. This warmth in light is defined in the Kelvin scale. Buying a light bulb you can decide the color temperature. What interested me was how light is used in different spaces. Therefore I searched in the internet for extreme examples of light. That’s how they look next to each other:

Example

Even what we think of as white can be different. Some people are very aware of these differences for most of us light is just there and we don’t really care about it. Even if flickering LED’s in offices produce physical stress or candlelight can make someone look more attractive. In my color system I want to make these differences visible. I made a list of places that possibly show them:

Museums, Libraries, maybe private kitchens or restaurant kitchen and offices. I wanted to visit three of each to be able to compare them.

Public spaces are often aware of the kind of atmosphere they want to create. A library wants to be inviting, a museum wants to direct the visitor to the artworks and in other places it could be more about having enough light and not so much about the atmosphere.
I took my camera and started photographing my first stop was not on the list, but close to Rietveld. A parking lot. I saw a lot of flickering LED lights, green lights from the electronic car chargers and blue lights in the elevators. It was day but by night is must feel a bit scary there. Next to photos of light the photos became more and more architectural.

Parking Lot

The architecture of the places continued to play a role in the next pictures too. In the Eye Museum it was dark with a lot of projections and also purple light. That was the point where it went away from only the spectrum of white lights. The purple light was nicely cut by the edges of the building and created beautiful shadows.

>Purple Edge

To stick to my list I went to three different libraries. With a lot of warm and yellowish light. The photos I chose in the end where mostly from the central library.
In the end I did not visit all the places but I had a feeling of continuing the collecting without any direction, so I wanted to have a format to put them before taking more pictures. I chose the Leporello. With not much experience in book binding I wanted to try a new format that’s easy to teach myself. The part where I struggled the most was still to come. Making the selection of my photos and arranging them.

Example

I printed the photos out, cut them in the middle and rearranged them. I wanted to select them by a similar place or color, but when I printed them out I found it more interesting to combine the different ones. Now it was a bit like puzzling the photos together and making two rows for each side of the Leporello. Some of the photos from really different places fitted very nicely together. I was happy about the selection, and didn’t want to compromise them more. From the printed photos I went back to the computer and fitted the photos on A3 sheets, so each photo was about a size of 15cmx 21cm. What I realized after the printing is that in this size the photos not really matched the format any more. I still wanted to see how they looked as a finished thing. So I started putting everything together.

Front

Leporello

Looking back on it now, the Leporello is a step in the process. I found it difficult to find the right frame for it and to make the step after having a selection of photos. I put the Project to the side, because I did not have an idea how to change it. Since I started writing down the process I think about continuing with the color system. I thought to make more pictures that have green, blue and red light. Which are on top of each other white light. I thought about my presentation of the discovery of Maxwell and tried to split one of the photos I liked most into the three basic colors. I printed it on transparent sheets and hold them into the light. The result I liked a lot and I thought to use them as a cover for a new booklet. Maybe not a Leporello and probably a bigger size. The next step is to take my camera and add the missing photos to the selection. What I learned from the last time is to be more selective about the photos and what I missed was to have a specific eye on what photos I’m looking for. To make the book look more finished I want to visit the bookbinding workshop instead of DIYing everything.

FEWWM! – more than just colours


Monday, April 2, 2018

12

When I started my research on colours, I wondered about certain colours that feel special to me and why. It seems that the way I perceive colours is rather deeply emotional response that sometimes tends to be irrational. Yet, power of colours rules my everyday choice from the food I eat to the clothes I wear.

Somehow I was naturally drawn to the traditional Korean colour symbolism and East Asian colour theory as it used to affect my decision a lot in my childhood. I wore yellow clothes on the day of the exam, and I slept in red pajama when I got scared of ghost. I admit that it was rather superstitious at that time, but still, I give special significance to colours in a random, but emotional way.

My first approach to this project was to bring an East Asian perspective on colours.

A week before the project had been started, we researched about 20 existing colour systems and presented them to the class. While watching the colour studies developed by philosophers, psychologists and artists from Western countries, I got really curious about how East Asian point of view on this matter would be different. I took the traditional Korean colour spectrum, also known as Obangsaek as a starting point of my research.

 image no.2

Obangsaek is the colour scheme of the five Korean traditional colours of blue, red, yellow, white and black, and each colour is related to certain elements in the world, including various virtues, emotions, and even the celestial motions.

Our ancestors used these colours to make decisions because following the Obangsaek was equal to following the way of nature.

I  found that the five colours are also associated with the five elements (or the Five phases; water, fire, wood, metal and earth) in Yin Yang , which are the core concepts of Chinese cosmology.

Wu_Xing

Blue: wood

Red: fire

Yellow: earth

White: metal

Black: water


I got fascinated by this cosmology as it sees the world as an organic whole where everything can be grouped into the five categories according to its nature.

In the table below, you can get brief examples of how it works.

22

Next idea was to make a series of image collages just to experiment the idea with visual elements.

imge no.5-1

image no.5-2

My interpretation of this idea was to show the connection between the colours and the elements and, by extension, the world we live. Then, I decided to make three dimensional objects using the five elements as materials because I thought it would be great if I relate the colours to something material in our everyday life.

After creating a concept for my system, I wrote a short introduction to it.

——————————————————-

In Korea, traditional colour symbolism is based upon the five elements and the five basic colours (blue, white, red, black and yellow). These five colours reflect the traditional principle of Yinyang (umbral and bright) and Wuxing (Five Phases: water, fire, wood, metal, and earth) which are the core concepts of traditional Chinese cosmology.

This cosmology perceives the universe as an organic whole, in which the spiritual, natural, and human worlds are ordered into a single, infinitely interconnected system.

It groups phenomena into the five categories, in which relationships are held to be relatively regular and predictable. Eventually, all things in the universe are categorized and correlated, and everything affects everything else.

Entities, processes, and classes of phenomena found in the human world (the human body, behavior, morality, and historical change) are set according to various entities, processes, and classes of phenomena in nature (time, space, the movements of heavenly bodies, seasonal change, plants and animals, etc.).

FEWWM is a new colour system invented by myself. It is rooted in the existing idea of Wuxing and Obangsaek (Korean traditional colour spectrum).

FEWWM, however, differs from the traditional East Asian colour theory in that it has a three-dimensional material feature.

Using found objects, I created a series of sculptures in correspondence to the five elements; wood, fire, earth, metal and water.

Possible colour mixtures are represented in a form of two mixed materials and the colour of the background indicates what a combination of two produces.

FEWWM expands its range into objects of our daily life, spreading the idea of the correlation of all.

——————————————————-

image no.6

By making these drawings, I tried to merge two different elements into one object and show how the combination of colours could be represented in this system. Then I collected the materials around my neighborhood and started to make a series of objects. Then, I photographed them to show our class mentor as the original sculptures are extremely fragile to carry.

??


??

I struggled a lot to come up with an ideal way to present my system, and my initial thought of the final result was to put a fabric mat with a diagram like below on the floor and place the small objects according to the position of the five elements.

7EB37F2A-A2C5-4CAB-83E9-C1DEFCDC490E

However, I could not be satisfied with the idea as I felt something was still missing. That was the moment where I took one step back to the photographs and decided to bring colours back to my system.

Thinking about a way to invite colours to photograph, the background seemed to be an interesting material for me to work with colours (like Joel Meyerwitz’s photographs of objects). I tried different colour paper and took photos of them. The result was amazing; the photographs really capture the synergy between the objects and colours. When I first saw the photographs, I got absolutely convinced that I should make a publication with them.

13151617

14

I took the first letters of each element and named it ‘FEWWM’. I like it when it is with exclamation points (!) because then it looks like a sound effect (FEWWM!). For the covers, I made a drawing of fire, earth, wood, water and metal. I used grayish colours for the covers since the inside was pretty full of colours. have a look…(click here)


I found that the way I write down the five elements keeps changing in the publication. Sometimes it is fire, earth, wood, water and metal, but sometimes it is wood, fire, earth, metal and water. Also, I was not aware of the fact that prints on this kind of paper get more finger prints and scratches. However, I really liked the assignment and result. From the oriental cosmology to printing/binding technics, I have learned so many things and had a lot of fun doing it. It was also a great opportunity to introduce Korean and East Asian culture to the school project.

FEWWM is a complete colour system as itself, but there is a lot to explore.

For the next step, I am thinking about making sculptures with more than three different materials referring to mixtures of three or four colours. There are as many as possibilities there are colours.


??

A Bipolar Wardrobe


Monday, April 2, 2018

For many people colours have stark connotations related to their moods. Think of sayings like “feeling blue”, “being green with envy”, “seeing red” or think about mood-rings that supposedly change colour every time your mood changes. Undoubtedly moods and colours are intertwined in one way or another.

Thinking of mood swings related to colour makes me think of my mother, who has bipolar disorder. Bipolar disorder causes swings in mood, energy, and the ability to function throughout the day. It is known for alternating periods of depression and mania that can last from days to months. Thus she has experienced extreme mood swings. How does she relate her moods to colour? She personally doesn’t clearly remember what happened during her manic episodes, I however do and noticed how her mania and depression greatly influence her way of dressing. She has a wardrobe filled with exotic clothes in all colours of the rainbow and lot’s of different prints and styles. When being manic she dresses herself as an artwork before going outside, making heads turn wherever she goes. When being depressed she doesn’t really dresses herself, but instead stays in her grey pajamas’s at home all day. I think that a lot of people might experience that they wear more colourful clothes when feeling happy and wearing more neutral toned clothes when feeling sad.  I decided to create a colour system based on my mothers way of dressing, and not on people’s way of dressing in general or on people with bipolar disorder’s way of dressing. I thought it would be generalizing people’s experiences too much and I think that especially dealing with people who have a condition like bipolar disorder one must avoid that to avoid stigmatizing the disorder. Not every person with bipolar disorder has the same behaviour towards their wardrobe, or the same experiences in general.

After having decided to make a colour system based on my mother’s way of dressing, I read a lot of general information about bipolar disorder, which didn’t bring me any further in the development of my project. I could also hardly ask my mother any questions about it, as she doesn’t remember how she was when being manic. I later found an interesting article written by someone who also has been diagnosed with bipolar disorder, about what having this disorder means for their gender identity. The writer of the article identifies as a non-binary person, and thus I shall refer to them as “their” and “they”. They experience that when being manic they feel more feminine, and when being depressed they feel more masculine. This shows itself in many ways, one of them being the way they dress. When feeling manic, they will wear a dress, when feeling depressed, they will wear baggy clothes. This made me realize how my mother’s way of dressing doesn’t only change in colour when her mood does, but also in how traditionally feminine versus masculine her clothes would be. When being manic it wouldn’t be a bright yellow sweatpants she would put on, but a bright yellow dress. When being depressed she wouldn’t put on a grey miniskirt, but grey oversized sweatpants instead. This was something to keep in mind in the development of my colour system.

After researching I figured it was time to start working hands on. I collected all the traditionally feminine colourful clothes and the traditionally masculine baggy neutral toned clothes from my own wardrobe. I realized that I order my clothes by colour in my wardrobe, in some way I was thus already working on this project of making a colour system before it even started. With the clothes I tried making a small installation without damaging the clothes, this was very frustrating. Somehow nothing I tried seemed to work for me and I soon decided to quit trying. I felt like the best ways of displaying clothes without damaging them already existed and happens all the time and everywhere, which is putting them on mannequins, on hangers or folding them neatly. I didn’t feel like playing clothing store, so this was not the way to go. I took a step back from the whole process, let some time pass to then later come with new insights again. I concluded that the colour system I was trying to create already existed and just needed to be documented. I decided to make a video with my mother, of her wearing two bipolar outfits.

dav

The filming went very smoothly, my mother and I enjoyed putting the outfits together and enjoyed spending time together, which to me makes the video feel genuine too. We tried to make the contrast between her two outfits/moods very clear, but still true to reality. This lead to us filming her depressed outfit inside on the couch, and her manic outfit outside in a field of flowers with more movement. I later also edited the video to be slowed down when her depressed outfit was shown, and sped up the video when her manic outfit was portrayed. When presenting the video, I went back to trying to make an installation using my own clothes but now including the video shown on a tablet. I felt like just showing the video on a big screen would not fit how personal and tangible someone’s clothes, and thus my colour system, are. To make it even more personal/intimate, the viewer of the work needs to wear headphones to hear the sound of the video.

Here are some stills from the video:

Fast walking in a flowery field

Comfy outfit

Colourfull outfit in a field of flowers

Reading glasses with tape

Food color perception


Monday, April 2, 2018

You know how, when you have a bag of sweets, the yellow one is going to taste sour like a lemon, the green one tart like a green apple and the red one will taste the sweetest, like a strawberry.

Have you ever had a blue sweet? They do exist but often don’t represent a certain familiar kind of food. The blue is “odd-tasting”, the blue one is often considered the least tasty of these four colors or at least the least familiar. This is because we are used to associating dark colors, like black and blue, with rotten foods.

Different research over time has proven that color can affect the (sense of) taste of different kinds of food. Even if the food doesn’t actually taste sour but is yellow, our brain will respond to that colour and tell you that this food tastes sour.

“we taste with our eyes long before we taste with our mouths”. Here is a short video of an intelligent looking man telling you more about this phenomenon.

I know there are a lot of interesting turns on this “color” theme but this topic of color in connection to taste and/or the expectation of taste  is one I found particularly interesting because apparently we can change each others senses of what we see just by changing a colour which is pretty spectacular!

So; I did some research and wrote the basics of what I found down in my notebook.

Notebook1 Notebook2

Certain colors stand for certain tastes as well as the perception of the freshness and/or ripeness of the foods we see. Our brain creates this link between color and taste and/or smell and also just the expectations of the taste of certain foods.

For example; we expect a red apple to taste more sweet in comparison to a green apple that would have a way more sour taste (which is ok because we know that red is sweet and green is sour).

I wanted to somehow capture this occurrence and I figured that the best way to let the colours speak would be on a photograph because this way the look of the food (where you say “this shape looks like a banana”, or “this shape looks like a lemon”) is the only thing determining your expectations of the food and not the smell, consistency etc which I felt would not make my point stronger.

The next step was to take pictures of a banana, a cooked stake and a tomato, putting them on a differently-coloured background in each picture.


Bananas 1

Steak 1

Tomaat 1

I didn’t feel this worked at all. Looking at these pictures, my perception of the food didn’t change. It looked flat and the only thing that came up with me was how much the bananas looked like an Andy Warhol print.

Andy bananas

So then I read about this one study (click “download” in the link. p.22 of the downloaded file) that took place in the 1970’s where investigators had put participants in a room with a colored light and a plate containing cooked meat and fries. Because of the dimmed colored light the participant wouldn’t really be able to determine the color of the food.

Once they had half way finished the plate the light in the room would slowly go back to a normal color which revealed that the meat was blue and the fries were green. As a reaction to this, a lot of participants refused to finish the plate and/or immediately felt sick.

I think this was a strong investigation because it shows very clearly that the color of the food is very important to our brain. It has to work. Our banana simply has to be yellow and our apple red or green, otherwise your brain will definitely warn you not to eat it and it will look way less attractive to eat.

Notebook3

Some extra ideas that came up

So I figured this was what I did wrong with the banana.

This is where the idea of colouring the actual food lured me in. It made total sense that when it would work in this study, it might also work on my photograph.

This way the shape of the food would not cooperate with the color it had which might not work for our brains.

I chose new foods that have a clear taste in our head. So a lemon, a hamburger, a vegan burger and a banana.


Bananen 2 Burgers 1Vega 1 Citroen 1

And then I painted them which made me decide to let the vegan burger go because this was near to impossible to do and it didn’t have the look that I wanted it to have.


Geschilderd boven 1 Geschilderd boven 2

I took these photo’s from above (see above) and thought it was too clean which food isn’t. To me, making the pictures from above made the images look flat, less like real (eatable) foods but rather like something fake, non-existing.

This is why I decided to take the next pictures from the side rather than the top, like the food would be laying in front of you when you look at the image. I used two different background colors for two reasons; To further convey a spacious effect (rather than flat) and to experiment further with the color perception at the same time. The latter conveyed by trying to make the changing perception with different colors more clear in one single image. You could put your hand on the top part of the image and the experience would be different than when you would cover the bottom part, just like it would be different looking at the image and the colors as one whole.

Geschilderd 3D

Then I would have to make a next, maybe final, step. What images/image should I use as my final work or should I just continue experimenting until the end result will automatically present itself to me?

Should it be a book? A print? A collage? Everything? A lot of times a photo (series) is displayed in a frame on a wall and maybe also sold in a booklet or on postcards on the side. Is that how it should be with this work? And if I would put work on the wall. Would that be one photo or a series of photos and how would that work since all the works have different colors with the possible result that the colors don’t go well together on the wall.

There are a lot of possibilities but for now I found one way to present the final work I was particularly happy with because of the overall composition of the images I was content with made above but also, to be honest, kind of based on intuition and the general feeling some of the pictures gave me.

I think that, in general, the pictures are very well able to work by themselves but I also think that the images have the ability to amplify/strengthen the general notion of this work, the changing perception of food depending on color.


So in this instance I chose, as perhaps a final work (for now), a collage of different images working by themselves, together.


Eind 1

WHATISAWHILE’S COLOR SYSTEM


Monday, April 2, 2018

Aim: I need to combine two words which I found very different from one another: ‘system’ firstly appears to be very restricted while possibilities seem to be unlimited with ‘color’.


FIRST CONCEPT: Connect the situation in which you currently find yourself to music thanks to colors.

Process: You’re heartbroken and alone in the shower.
Find the key words: heartbroken, alone, shower.
Each key word is associated to one color: heartbroken = purple, alone = blue, shower = grey.
In the system, clic on the key words’ fitting colors « purple, blue, grey», it will send you a playlist matching your current needs.

Questions: How to realize the system? Do I use the computer or do I make it by hands? If computer, which site or application should I use? Need to select key words: how many, which ones and why? Do I use common key words or specific ones?

Issues: Want to use computer (better quality of colors, easier to extend the visibility and good way to classify data), I could find a specific application or website. I’ve been told by a classmate, who has studied computer science, that applications she knows are not for amateurs like me but professionals.

Conclusion: Because of a lack of knowledge and no skills in code I can’t bring this first concept to a successful end. I’m better to modify my system so I could create a new realizable one.
I still want to use the computer as my main tool.
However, I want to make this project more personal and subjective, meaning that I want the color system to depend on me. I will set my own rules.

Transition
I’ve asked to a friend of mine, a singer, if he was associating people with music, he answered he wasn’t and return me the question. Then I realize: I’m not associating music to people but colors. Indeed, when I paint someone the association of colors I choose come from what this latter inspires me, what he radiates out.
What if I would connect colors to something else than people? About me? (reminder: want to make this project more personal and subjective). I could write about my personal life? What occurred to me during the day? And connect this specific moment with a color?
From this developed the idea of my second concept: associate situations to colors.


SECOND CONCEPT: Connect a situation in which you have found yourself to colors.

Process: I’m going out of the cinema, touched by the movie I’m lost in my mind. Which color do I see at this current moment?
1) Visualize the color you’re seeing at the current moment
2) Find the color on internet
3) Save it on your phone
4) Give the color a name
5) Write a short sentence describing the situation linked to the color
6) Write the date and city

Questions: Want to use the computer but no code, what should I do? Where should I publish this system? Find a reachable application? Which application would fit the best?
 

 Answers: Instagram

+ Concept: share simultaneously what you’ve done with your followers.
+ Design: matching the concept (edit an image, description bellow, location, share…).
+ 1 Square 1 color: focus on the main theme ‘color’, interesting visual aspect (variety of colors).
+ # ‘hashtag’: to be seen and share data.
+ Follow or be followed by similar accounts


Ideas to complete:
1) Account’s name: ‘What i saw while’ = @whatisawhile
It refers to which color I’ve seen while a daily situation occured to me.
2) Profile picture: The color I identify myself with.
3) Short sentence to describe the account’s theme: ‘I associate everyday situations in which I find myself to colors’.

4) Description bellow image: for each image the description will start the same ‘What i saw while’ to give the account a rhythm and an identity and for the viewers to remember the account’s name.
Always the same plan for each publication: 1 color as an image – 1 title as color’s name – 1 sentence to contextualize – 1 date – 1 town – few hashtags.


FINAL PROJECT


WANT TO SEE MORE OF WHATISAWHILE‘S COLOR SYSTEM?

GO follow @whatisawhile on Instagram to discover other stories hiding behind the colors!! 🙂

Responsive Color System


Sunday, April 1, 2018

After researching information about different color systems, I realized that all the systems try to approach questions of color always in relation to something. Color in terms how we describe it in language, color as light, color as pigment, color as sound. As for the color in relation to human body there is a Chakras system. But it is all fixed, and doesn’t explain movements of the body. I see human body as a constantly changing system, it is changes every second, and I wanted to develop during this project I wanted to create color system which describes movements of the human body into the color, in the real time. I wanted it to be really interactive and visual.

illustration1_950                   illustration3_950

So I split whole process into two steps. First step was to find a sensor which will “read” movements of the body. There were several ideas possible, but after some try outs with heart rate monitors, ultrasonic motion sensors, I ended up using HC-SR501 Passive Infrared Motion Sensor (PIR) sensor. The module features adjustable sensitivity that allows for a motion detection range from 3 meters to 7 meters.  The device will detect motion inside a 110 degree cone with a range of 3 to 7 meters. I was using raspberry pi computer to program reactions of the sensor.

Second step was to find the way to represent the data from the motion sensor. I wanted to work with light. There were some ideas to use projectors. But in the end I was using Philips Hue lamps because they have open API and it is easy to program them.

There were some challenges with Philips hue lamps. They do not work by independently. If you want to communicate with lamps there is a physical device which called a bridge. . The Philips Hue bridge is the heart of the system. When you are programming, your are not communicating with lamps directly, you send commands to the bridge, and the bridge sends messages to lamps so they know, which hue and saturation apply to the lamp. Problem is that this bridge should be connected to wifi network. In school wifi network is secured, so you can not that easily add new device to it. This lamps are meant for use at home, and not really designed for the usage in the public locations.  So basically the solution to this problem was to create my own network. Raspberry pi computer became dhcp server and was assigning IP address to the bridge. It is very important to know IP adress, because than you know where to send your commands in program. So the whole system do not depend on the network connection and know can work on any location.

About the transformation of the movement to color. I built the whole system and tried it on the spot in the school. Originally it was working from the simple lamp. I installed the lamp in school and was observing people behavior how they react on the lamp. First setup was like this whenever someone pass by or approach the lamp it will switch on and start changing colors. This was clear, I noticed that once people realize how it works, they lose their interest in it. Like puzzle is solved. And usually it take 30 seconds for them to realize and they move forward. And also there were not so many people who will notice it in the first place. So I added blinking to get an attention of the passing by people. And once they approach lamp it will start changing colors, but with 5 seconds delay. After this changes there were more people discovering the work. And they spend way more time with it. Puzzled, and trying understand what action trigger lamp.

Next step was to put everything together in one container. So the whole system can work as portable device and can be shown in different locations.

As for the next steps I think it would be interesting to add more sensors. After some tests in library, I realized that people want to touch the object. It would be nice to add one more reaction to touch. And make more tests in different spots: Library, cafe, train station.


The birth of the Intrinsic Colour System


Friday, March 30, 2018

When thinking about colour  I immediately become somewhat insecure. For me colour has a strange randomness to it and therefore every choice I make based on or about colour becomes almost arbitrary. There is also this common colour psychology theory people start quoting when talking about colour. Maybe it is because they are just as uncertain about the subject as I am. Or maybe it is because they do know what they are doing when using colour.

In order to keep evading the subject of colour during this project I had to figure out how I used colour in previous works. It turns out that most of the things I made aren’t colored. Of course they have a colour, but that is because the material of which the object is made has this colour as a natural property. If a thing I make is made from wood it will have a wood colour. If it is made from metal it has a metal colour. Not choosing a colour doesn’t mean you have to pick white, but it means to not cover the intrinsic colour.

Now with this new revelation about my colour use I had to think of a way how to put this in a system. A couple of weeks before this project I did some research about the DIN colour system. Which was an interesting experience. There was nothing to be found about it on the web or in libraries. This meant that I had to define what the system was about by combining multiple contradicting sources. Although that feels like you are just making up something it gave me some understanding of the general structure of colour systems. Most modern colour systems combine 3 parameters: hue, saturation and brightness.

glass  plastic  wood

brick  clay  marble

concrete  metal

The First step in translating these intrinsic colours to a system was to just combine the two ideas I discovered. I tried to find three parameters, not necessarily hue, saturation and brightness, in the materials I would qualify as materials I would use. The list got longer than I anticipated. And I started to notice something else; these aren’t materials I would use, these are building materials. The focus of my materials shifted from sculptural perspective to a architectural perspective. Not held back by this discovery I tried to put the materials in a circle as if they were colour hues. This led to a couple of interesting connections and contradictions.

IMG_9518

Now that the hue parameter was replaced by material I still had to come up with a replacement for saturation and brightness. This is where things started to go wrong. It didn’t take long before one of the biggest philosophical themes entered this soon-to-be colour system: time. I came up with the idea that the use of material changed over time and that the amount of a material that was used could make great graphs. Now brightness became time and saturation became the amount of the material that was used.

IMG_9520

Because this may sound a bit abstract I will try to explain it with an example. Glass was used in small quantities during the middle ages. With several improvements in the production process and by improvements in building construction larger pieces of glass were used in buildings from the end of the middle ages. An even better production process because of the industrial revolution combined with the modernist ideas of the first half of the 20th century lead to a enormous increase in glass use. Our obsession with high buildings, great views and daylight lead to the highest amount of glass used in architecture since ever.

IMG_9521

I made timelines like this one for all the materials in my material circle. Now I could make the step from theory to a specimen. It seemed logical to make the graphs of amount of material over time out of the material they are about. I figured out a way to do that but I still needed something for these physical graphs to be presented on. Within half an hour I went from a graph to a maquette with 12 buildings in the middle of Paris.

IMG_9522kopie

As I said when I had to come up with 2 other parameters, it already went wrong after the first step. The parameters where to abstract, farfetched and maybe with this last step to applied. I got stuck in an object that was just there as an object instead of what a colour system should be: a tool.

So now what? As with colour in general I decided not to use it. I did nothing with the project for a couple of weeks. But one day before the deadline of the project I had to come up with something. It was clear that the project was way to much thought and far to little hands on with the subject. I had to get out. Check out how these materials are used in the city and try to find transitions in material. So I took my camera out on this lazy Sunday, jumped on my bike and went on a slow journey into Amsterdam.

I just took photo’s of every building that used a material because of it’s qualities. This resulted in about 300 photo’s of bricks, metal sheets and glass. The selection could begin. By deciding whether or not I picture was more than just a registration I could narrow it down to about 60. Which I then sorted based on material and colour. Just like I did when making the material circle in the first step weeks ago. In the end I had about 35 images which made a colour circle that could start anywhere in the series.

Schermafbeelding 2018-03-30 om 16.37.57

It could be because of the medium or traditional ways to show colour systems, but it seemed logical to make a book of these photos. I tried to make spreads in which it would be sometimes difficult to see where one image starts and the other ends. To create this illusion of a gradient, but also to make them more abstract. They are not about the building that is depicted, but about the material of its facade.

An intrinsic colour being covered by another while both are being slowly smuggled away.

An intrinsic colour being covered by another while both are being slowly smuggled away.


I printed the spreads on separate sheets which then were connected like a leporello. Just because I didn’t know any better I connected them with a nice wide piece of double-sided tape. This made the leporello almost a structure, something that could stand on its own instead of having a cover. When installing it in a circle it didn’t work for me, it wasn’t as self supportive as it was in a book form. So I decided to add a cover that was attached to the last page and would wrap around the first page. This would complete the circle, it could still be viewed as a structure and it would still feel as a book. The material circle is printed on the back and is incomplete, for new materials to be added. I think this fits in the idea of it being a tool instead of just an object.

If there is one thing I learned from this project it would be that it is important to materialize the process. This project, for a major part about thinking, turned at the end into one about doing. Though this thinking was needed for the doing in the end I would like to experiment with reversing this process. Do first and analyze afterwards.


IMG_9525


IMG_9523         IMG_9530


IMG_9524


IMG_9529


IMG_9526


IMG_9527


IMG_9528


DIN colour system


Friday, March 30, 2018

din logo

DIN is the German Institute for standardization (Deutsche Institut für Normung). It is the official ISO (International Standardization Organization) member for Germany. So far they made about 30.000 Din Standards, many of which are now used as international standards. They for example made the DIN standard for photographic film,  the A-size for paper and the purple and green mouse and keyboard connectors.

The DIN is often mistaken for the Deutsche Industrie Norm, which is a name for standards another organization published in the early 20th century. Despite that they aren’t called that way anymore they do serve their main purpose in the (German) industry. So is the DIN colour system.

It took the institute about 10 years to come up with this system. Starting in the 40’s they had their initial results published in 1953. But because it is standard that is still used by the industry it has been regularly updated.

When the researchers started they had as an objective to create a colour system in which to make all the variables in steps that are equidistant. Hue, Brightness and saturation all work in different ways, especially when it comes to how the colours are experienced. In order to define these steps and relations they did visual experiments in which subjects had to pick from a range of 120 colours the ones that they thought were equidistant. They boiled the results of this experiments down to 24 colour hue’s.

schema

By adding Brightness  (Darkness) and Saturation a system started to form. Each of the 3 parameters got there own letter. T for hue, S for saturation and D for darkness. By combining these letters you would get a TSD code. Of course the system is not about the parameters, but about in which steps these parameters are divided.

T values are between 0 and 24 and can be interpolated. So you could pick a hue that is not in their carefully selected group of 24 colours. This would not undermine their system as these colours would still be on a equidistant scale of hue.

S values are always between 0 and 6 in which 0 is grey and 6 is maximum saturation.

D values are set between 0 and 10 in which 0 is absolute white an 10 is absolute black.

geelNow for example if this yellow would be described in a TSD code one would get a 2 as a T value, 5 as S value and 2 as D value. To correctly write down this code a colon should be placed between the numbers. In this case it would be 2:5:2.

I think the most interesting part of this system is that it tried to make all steps within the system equal. Even though this resulted in a system in which all colours are mathematically unequal.

Check out the following links for more in-depth explanation of the DIN Colour System.http://www.farbe.com or http://www.vcsconsulting.co.uk

Ignaz Schiffermüller’s Color System


Thursday, March 29, 2018

Ignaz Schiffermüller (1727-1806) was an Austrian naturalist mainly interested in insects, specially butterflies. He was a teacher at the Theresianum College in Vienna. Schiffermüller is also recognized for his work in optics and colour theory. He developed scientifically based colour nomenclature to describe the countless tones of nature.

ignazschmetterlink

In 1772 his work “Versuch eines Farbensystems” was published . It contained an attractive full-page engraving with a colour circle, inspired by the optical theory of French Jesuit Louis Bertrand Castel(1688–1757) and hand-tinted with twelve colours continuously shading into one another. He developed it based on natural samples of colour and colour charts where he compared the tones. The circumference of Schiffermüller’s circle is filled with twelve colours to which he has given some very fanciful names: blue, sea-green, green, olive-green, yellow, orange-yellow, fire-red, red, crimson, violet-red, violet-blue and fire-blue. The three primary colours of blue, yellow and red are not placed at equal distances from each other; between them come three kinds of green, two kinds of orange and four variations of violet (excluding the secondary colour violet). Schiffermüller selects a total of 12 colours like Father Castel who linked his system to music — more specifically, the twelve semi-tones of the musical scale.


book2_corr

Ignaz Schiffermuller’s system served to illustrate Newton’s discovery that the pure colours could be arranged in a circle. He was one of the first to arrange the complementary colours opposite one another: blue opposite orange; yellow opposite violet; red opposite sea green. Schiffermüller also placed a sun (only suggested here) inside his colour circle in order to emphasize that all colours are produced by nature.

Circle Drawing with the Sun

What all three scholars had in common aside from naturalistic origins of their studies is how tones of colours and shading is crucial for development of each colour. The gradual change in colour’s intensity is visually representing the natural unstability of colours and how we perceive them. Because of that we can consider Schriffermuller’s work as a contemporary study of colour.

Coloroid


Saturday, March 24, 2018

The color system ‘Coloroid’ was originated in Hungary, developed between 1962 and 1980 by the Professor Antal Nemcsics. The objective of this arrangement was to provide technical and artistic help to architects involved in colored environmental design. There was no contemporary color system that fulfilled the requirements stipulated for color planning.
In August 2000, the Coloroid system has been registered as Hungarian Standard, and used as the main colour system.

The system is operated with the three parameters of color-hue, saturation and brightness.
Basically, the value ‘T’ stands for saturation, or purity of the color, the cylinder is created around a 48-part color circle ‘A’ or wavelength, and the ‘V’ is the luminosity, the higher it gets, the luminosity is higher, and vice versa.

02col 03col

The form that it creates is a modified cylinder based on ‘psychosomatic scales’.

01col

The guiding principle behind the system is to show the aesthetic distance between colors as being uniform, due to the fact that the 48 different colors are being located at approximately identical number of harmony intervals to each other. Within this, as the smaller perceptual volume defined by the limit of colors, it is possible to reproduce with physical media (material, pigment colors).

3-Figure6-1

The interesting part of this system for me is the idea of harmony, and how it can be defined or create with a simple linear or geometrical combination of colors.

HERMANN EBBINGHAUS’ COLOUR SYSTEM


Friday, March 23, 2018


Hermann Ebbinghaus (1850-1909) was a German psychologist who pioneered the experimental psychology of memory. He is mostly known for his discovery of the forgetting curve (describes how the ability of the brain to retain information decreases in time), the learning curve (graphical representation of the rate at which you make progress learning new information) and the spacing effect (phenomenon whereby information is learned and retained more easily and effectively when its studying is spread out over time).


However, Hermann Ebbinghaus has also been known thanks to its colour system. Indeed, the concept of the double pyramid gained in popularity thanks to the latter.


In 1902, he proposed a new version of Hofler’s double pyramid. Ebbinghaus constructed a colour system rest on this system of double pyramid but made few modifications: he put rounded corners and an inclined central plane.


He rounds off the corners of the solid as he considered the transition between colours as fluid and not sharply defined. The Hering-type fundamental opponent colours are located at the six corners (black, green, red, blue, yellow, white).
The resulting chromatic body, from the four primary colours, links Leonardo da Vinci’s idea that colours vary in brightness and can thus be differentiated. The idea was to separate and so distinguish those four colours due to the variation of brightness.
The base-square of the double solid is tilted in such a way that the best yellow hues, which are relatively bright, are nearer to white, and the best blue tones, which are relatively dark, are nearer to black. His system does not predict the mixtures of colours and the complementary pairs are not arranged opposite one another.


In 1893, Ebbinghaus published a «Theory of Colour Vision» in the Zeitschrift für Psychology (Journal of Psychology), in which he mentioned that humans perceive colours through higher mental processes. As a psychologist, he knew about the perception of the four elementary colour (yellow, red, green, blue) and thanks to physiologists knew there were only three photo-sensitive substances in the eye’s retina (rods, cones, photosensitive retinal ganglion cells) thanks to which the phenomenon of coloured vision and its anomalies could be explained.


In addition, Ebbinghaus has discovered that two white hues produced by spinning either red and green or blue and yellow, appeared to be the same at certain levels of brightness, but appeared different when the illumination was reduced or the speed was reduced.

Phillipp Otto Runge- Colour Sphere


Thursday, March 22, 2018
The colour-sphere has the pure colours around the equator, starting with the three primary colours of red, yellow and blue. Three mixed colours take their place in each of the equal intermediate spaces between the primaries, while white and black form the sphere’s poles. Runge wished to capture the harmony of colours — not the proportions of mixtures. He wished to bring a sense order to the totality of all possible colours, and sought an ideal colour-solid.

• Philipp Otto Runge develops the concept of the color sphere. His goal was to show the complete realm of colors, using only the mixture of the three primary colors (red, blue, yellow). Runge saw the three colors as a “simple symbol of the Holy Trinity” and black and white as “light is goodness, and darkness is evil.” His idea was to expand the hue existing circle into a sphere, with white and black forming the two opposing poles.

•Featured are the primary colours red, yellow and blue. They have the same distance to each other. The secondary colours orange, purple and green also have the same distance. The upper part of the sphere is white; the colours become lighter. The lowest part of the sphere is black; The colours become darker.  Red, blue yellow, black and white have the same distance from each other.

iscc-nbs-system


Sunday, March 18, 2018


iscc


The ISCC-NBS system of color designation is a system of naming colors based
on a set of 13 basic color terms, it was first established in the 1930’s by a joint
effort of the Inter Society Color Council and the National Bureau of Standards.

Screen Shot 2018-05-23 at 19.19.22

The ISCC-NBS system believed colors should have names. The objective of the system is to assign precise names to the individual blocks of color of the A.H. Munsell color system, using ordinary words. And the systems goal is to designate colors in the Unites States Pharmacopoeia, the National Formulary and in general literature. And the system should be acceptable and usable by science, art and industry, and should be understood, at least in a general way by the whole public.


The backbone of the ISCC–NBS system is a set of 13 basic color categories,
made up of 10 hue names and three neutral categories: pink(Pk), red(R), orange(O),
brown(Br), yellow(Y), olive(OI), yellow green(YG), green(G), blue(B), purple(P), white(Wh),
gray(Gy) and black(Bk).

Munsell_1929_color_solid_cylindrical_coordinates


Then there are 16 intermediate categories, such as: reddish orange (rO) so an adjective and the hue name.
other example: purplish blue (pB).

These categories can be further subdivided into 267 named categories by combining a hue name with modifiers. Like the subdivision for Purple, you have all these works for how the color feels/looks, like: “blackish” (bk.), “dark-ish gray” (d.-ish Gy). So they really wanted to find a way to objectively measure a color. And I feel that this way is pretty objective for a color naming system. I find that this system is fast and easily communicated through the system they made using the brackets.

Moses Harris’s Natural System of Colours Wherein is displayed the regular and beautiful Order and Arrangement, Arising from the Three Primitives, Red, Blue, and Yellow, The manner in which each Colour is formed, and its Composition, The Dependence they have on each other, and by their Harmonious Connections Are produced the Teints, or Colours, of every Object in the Creation, And those Teints, tho’ so numerous as 660, are all comprised in Thirty Three Terms


Friday, March 16, 2018

Moses Harris, who lived from 15 April 1730 until 1788 in England, was a fanatic entomologist (this is someone who studies insects). As the first photograph had yet to be taken, it was common to use engravings to use as imagery to support your research. Moses did not outsource the making of these engravings, he made them himself. As the difference between two insect species is sometimes very subtle, the colours of Moses’s engravings needed to be very precise in order to be able to determine a species correctly. Thus grew his interest in colour.
 
Moses Harris engraving
 
In Moses’s quest to record insects as best as he could, he needed a new colour system that could help him when he was making the engravings of the insects. He decided to create his own colour system by using a  source that he as an entomologist was very familiar with, nature. He claims that blue, red and yellow are the prime colours, because those are the colours to be found back the most in non-domesticated flowers, thus nature must like them the most. He called them the prismatic colours, because those are the colours that are reflected by the prism. Which is quite remarkable, as his whole research is about colour in pigment and not in light like in the prism. The colours green, orange and purple he calls the compound colours, as they are made up from the prismatic colours. As Moses thinks that nature divides the prismatic colours and the compound colours, he decided to also separate them into two different colour wheels that together make his colour system. It is said that Moses is the inventor of the colour wheel.
He finished his colour system somewhere between 1769 and 1776 with a lot of enthusiasm. A bit too much enthusiasm maybe, as he named his colour system:
“Moses Harris’s Natural System of Colours Wherein is displayed the regular and beautiful Order and Arrangement, Arising from the Three Primitives, Red, Blue, and Yellow, The manner in which each Colour is formed, and its Composition, The Dependence they have on each other, and by their Harmonious Connections Are produced the Teints, or Colours, of every Object in the Creation, And those Teints, tho’ so numerous as 660, are all comprised in Thirty Three Terms”

Now this was a bit too long to go on the book cover of his publication about his newly realized colour system thus they shortened it to: “Moses Harris’s Natural System of Colours

If you’re interested to read more about Moses Harris’s Natural System of Colours, you can read more about it here on another designblogpost. 

moses-harris-prismatic-rca-mr_340 [x] Moses Harris's compound colour wheel


Log in
subscribe